> ## Documentation Index
> Fetch the complete documentation index at: https://docs.embedder.com/llms.txt
> Use this file to discover all available pages before exploring further.
# क्विकस्टार्ट
## शुरू करने से पहले
शुरू करने से पहले सुनिश्चित करें कि आपके पास ये चीज़ें हैं:
* एक टर्मिनल ऐप
* काम करने के लिए एक फर्मवेयर प्रोजेक्ट (या नया प्रोजेक्ट)
### सुझाए गए टर्मिनल
macOS और Linux के लिए [Ghostty](https://ghostty.org/) सुझाया जाता है।
**macOS (Homebrew):**
```bash theme={"system"}
brew install --cask ghostty
```
**Linux:**
```bash theme={"system"}
# डिस्ट्रो-विशिष्ट स्टेप्स: https://ghostty.org/docs/install
```
Windows के लिए [Alacritty](https://alacritty.org/) सुझाया जाता है।
**winget:**
```powershell theme={"system"}
winget install Alacritty.Alacritty
```
**Scoop:**
```powershell theme={"system"}
scoop install alacritty
```
## चरण 1: Embedder इंस्टॉल और लॉन्च करें
```bash theme={"system"}
curl -fsSL https://embedder.com/install | bash
```
Native इंस्टॉलेशन बैकग्राउंड में अपने-आप अपडेट होते रहते हैं।
```powershell theme={"system"}
irm https://embedder.com/install | iex
```
Native इंस्टॉलेशन बैकग्राउंड में अपने-आप अपडेट होते रहते हैं।
```bash theme={"system"}
cd your-project
embedder
```
## चरण 2: अकाउंट में लॉग इन करें
पहली बार इंटरएक्टिव सेशन चलाते समय लॉगिन करना होगा:
```bash theme={"system"}
embedder
# पहली बार लॉगिन प्रॉम्प्ट मिलेगा
```
अगर वेब ऐप ऑटोमैटिक नहीं खुलता, तो टर्मिनल में दिखा लिंक खोलें।
बाद में अकाउंट बदलने के लिए `/logout` चलाएँ।
## चरण 3: पहला सेशन शुरू करें
```bash theme={"system"}
cd /path/to/your/project
embedder
```
अब प्रोजेक्ट सिलेक्शन स्क्रीन दिखाई देगी।
### प्रोजेक्ट बनाना
 ### प्लेटफ़ॉर्म चुनना
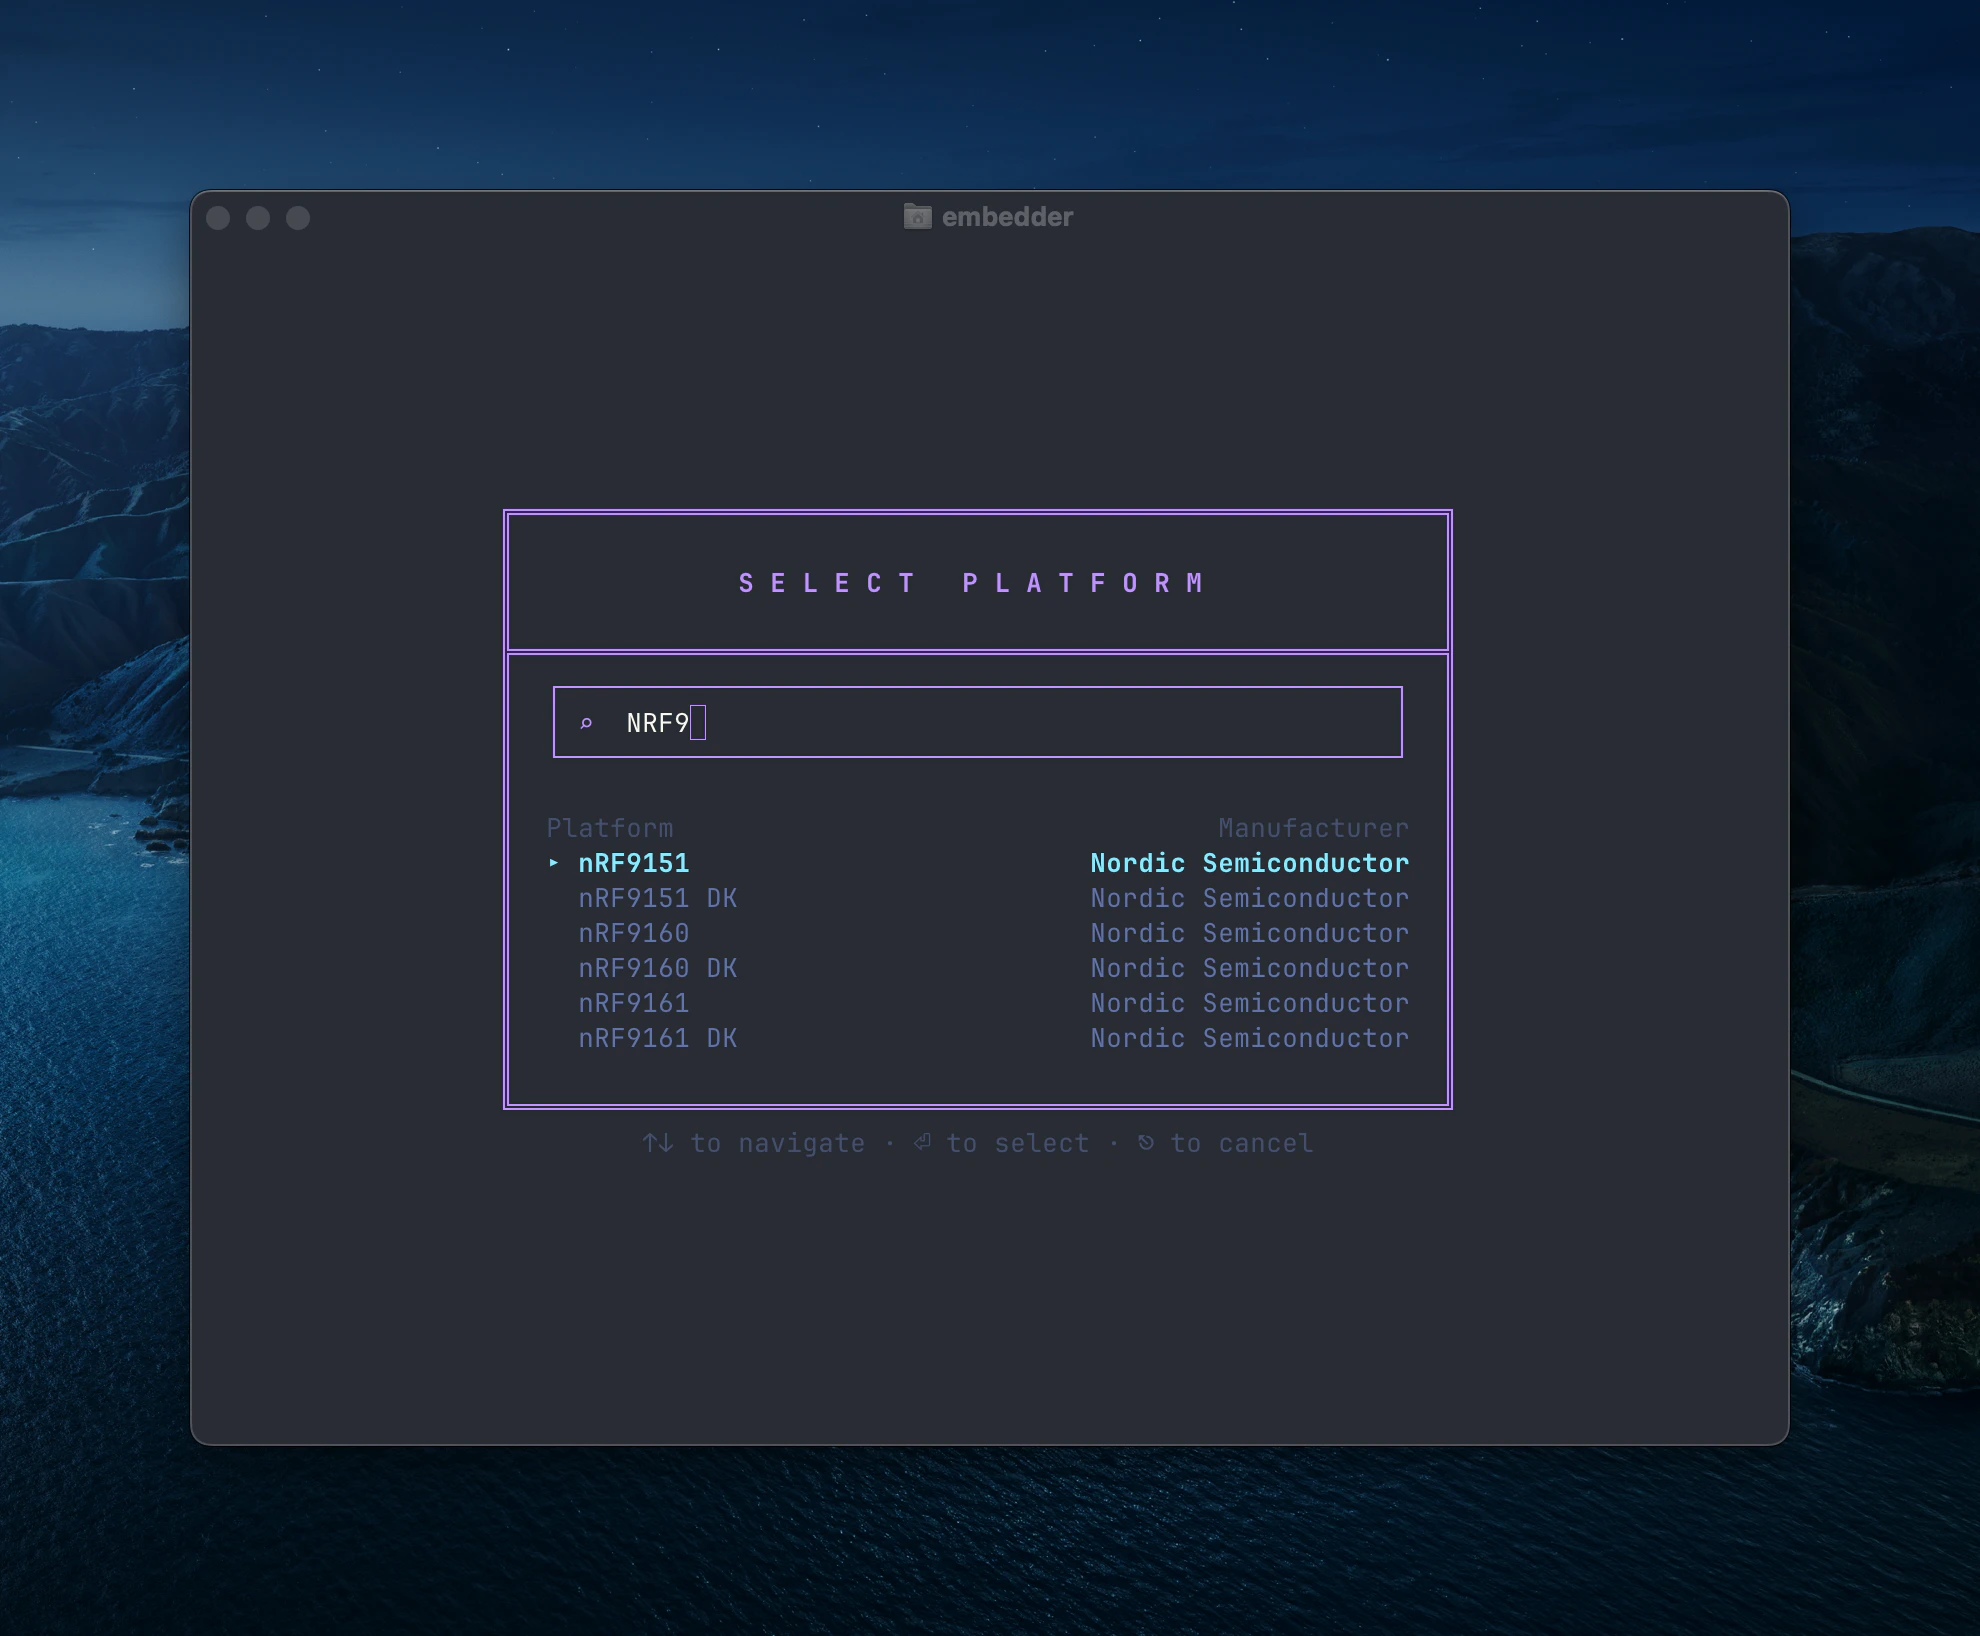 अपनी हार्डवेयर के मुताबिक प्लेटफ़ॉर्म चुनें। कस्टम प्लेटफ़ॉर्म के लिए [Common Workflows](/hi/core-concepts/common-workflows) देखें।
### पेरिफेरल चुनना
अपनी हार्डवेयर के मुताबिक प्लेटफ़ॉर्म चुनें। कस्टम प्लेटफ़ॉर्म के लिए [Common Workflows](/hi/core-concepts/common-workflows) देखें।
### पेरिफेरल चुनना
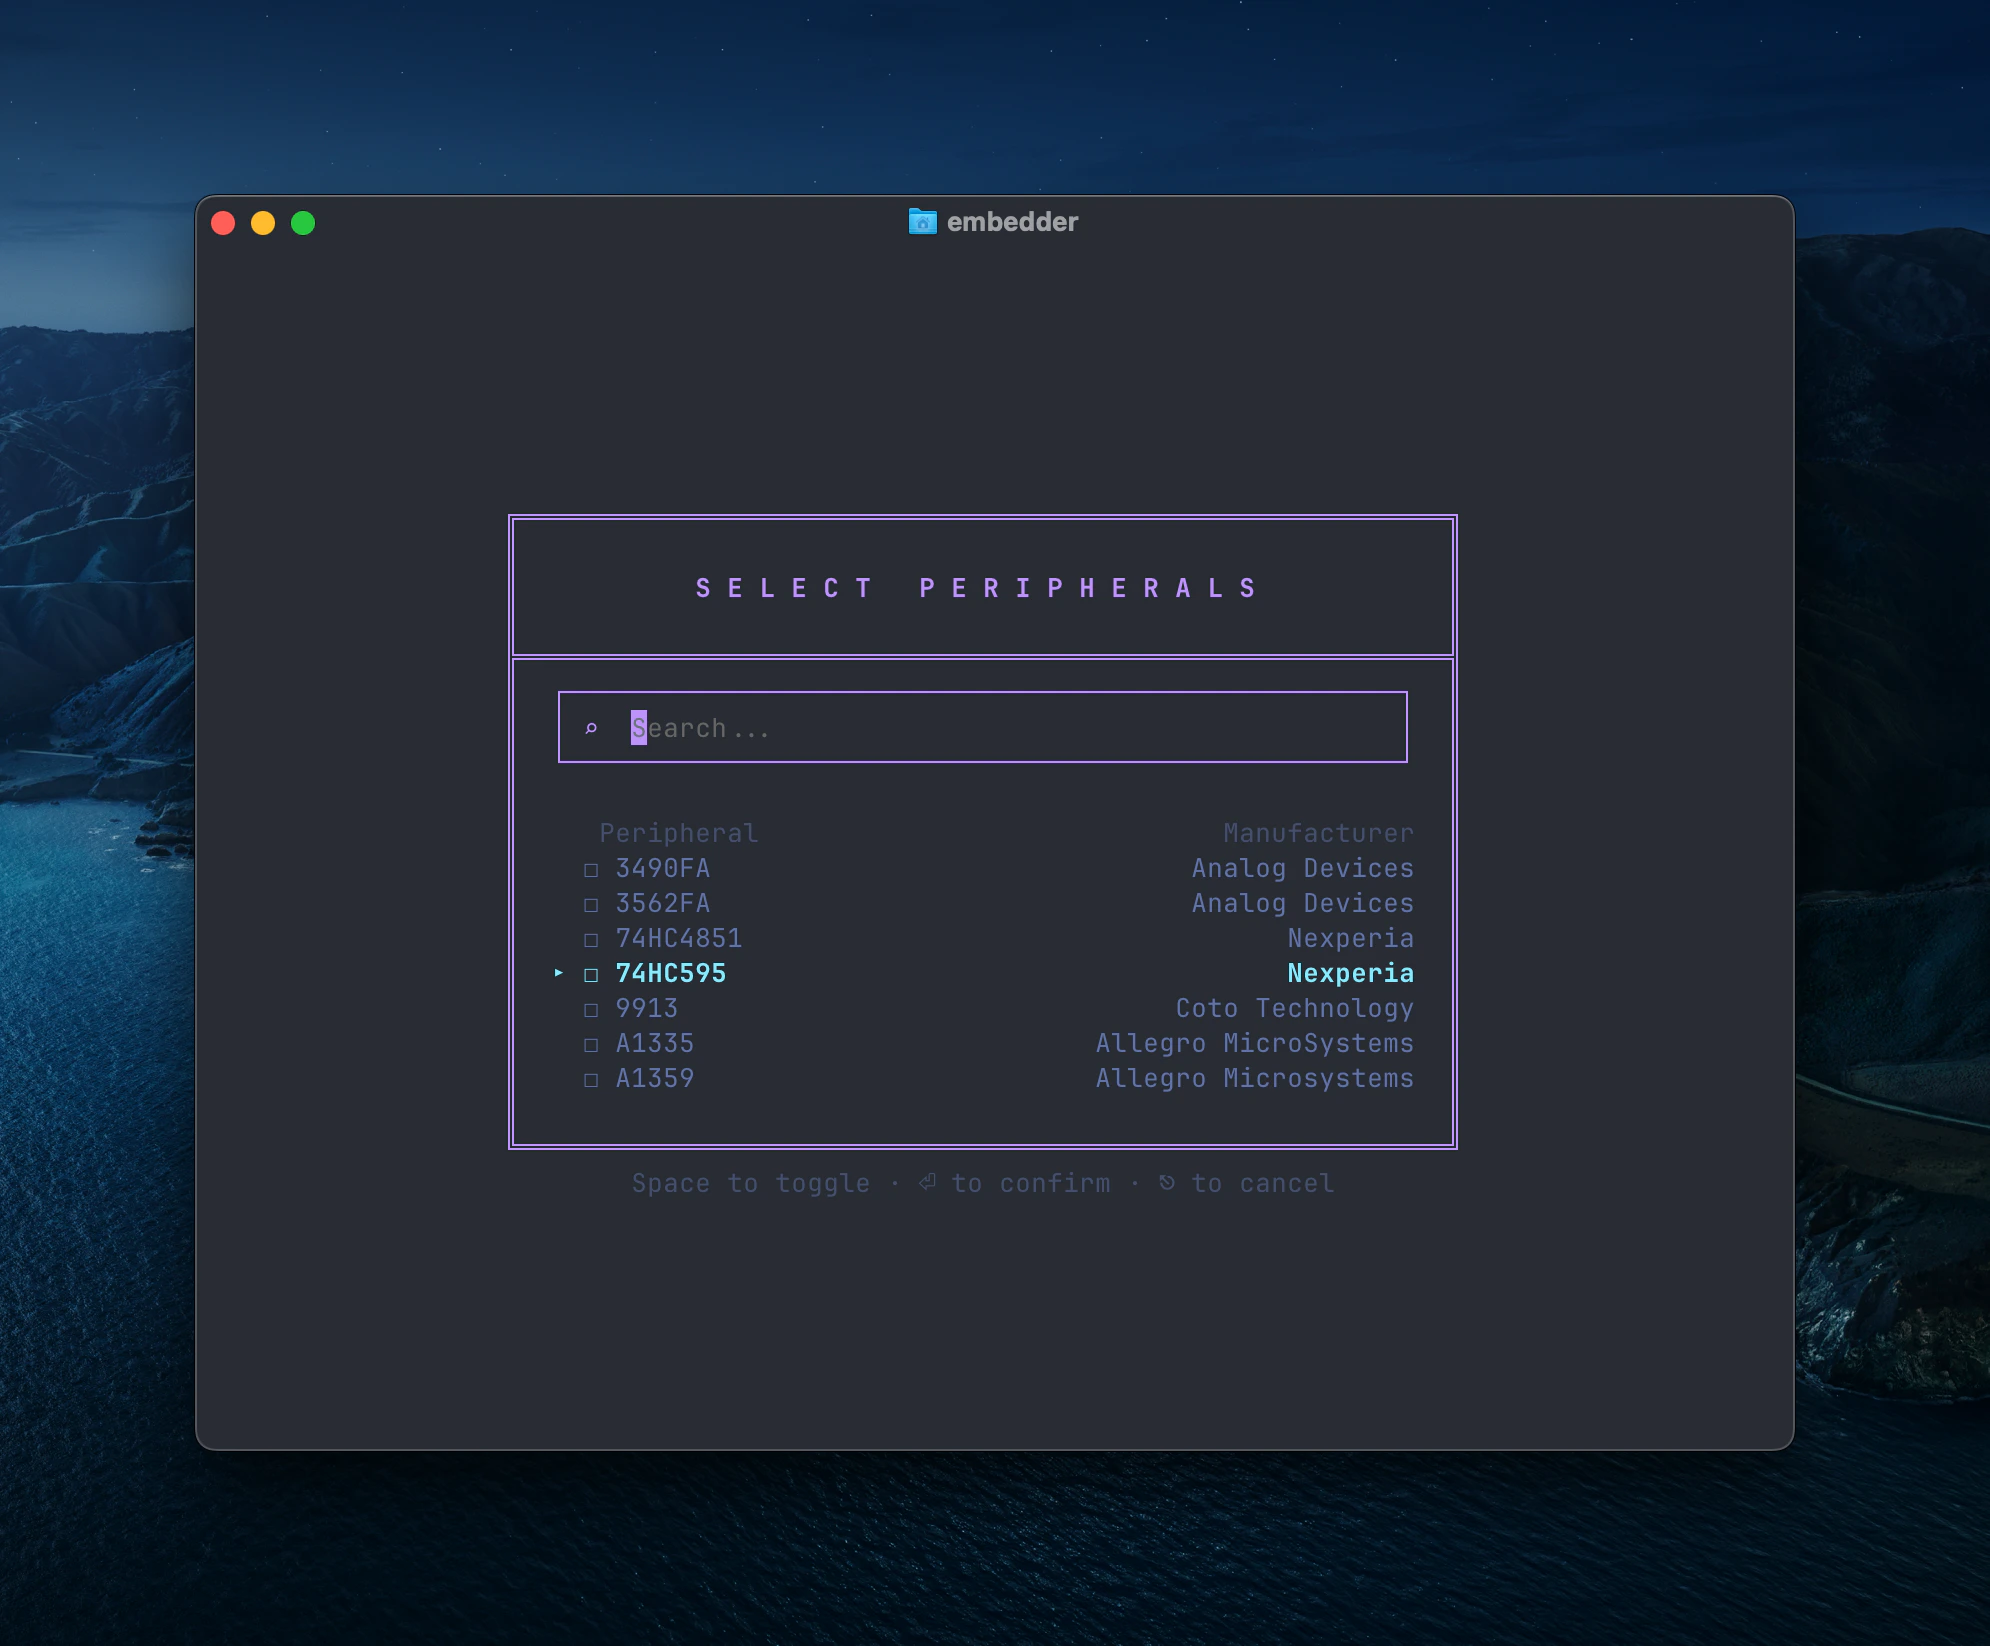 कस्टम पेरिफेरल जोड़ने के लिए [Common Workflows](/hi/core-concepts/common-workflows) देखें।
बाद में `/peripherals` से पेरिफेरल कॉन्फ़िग बदल सकते हैं।
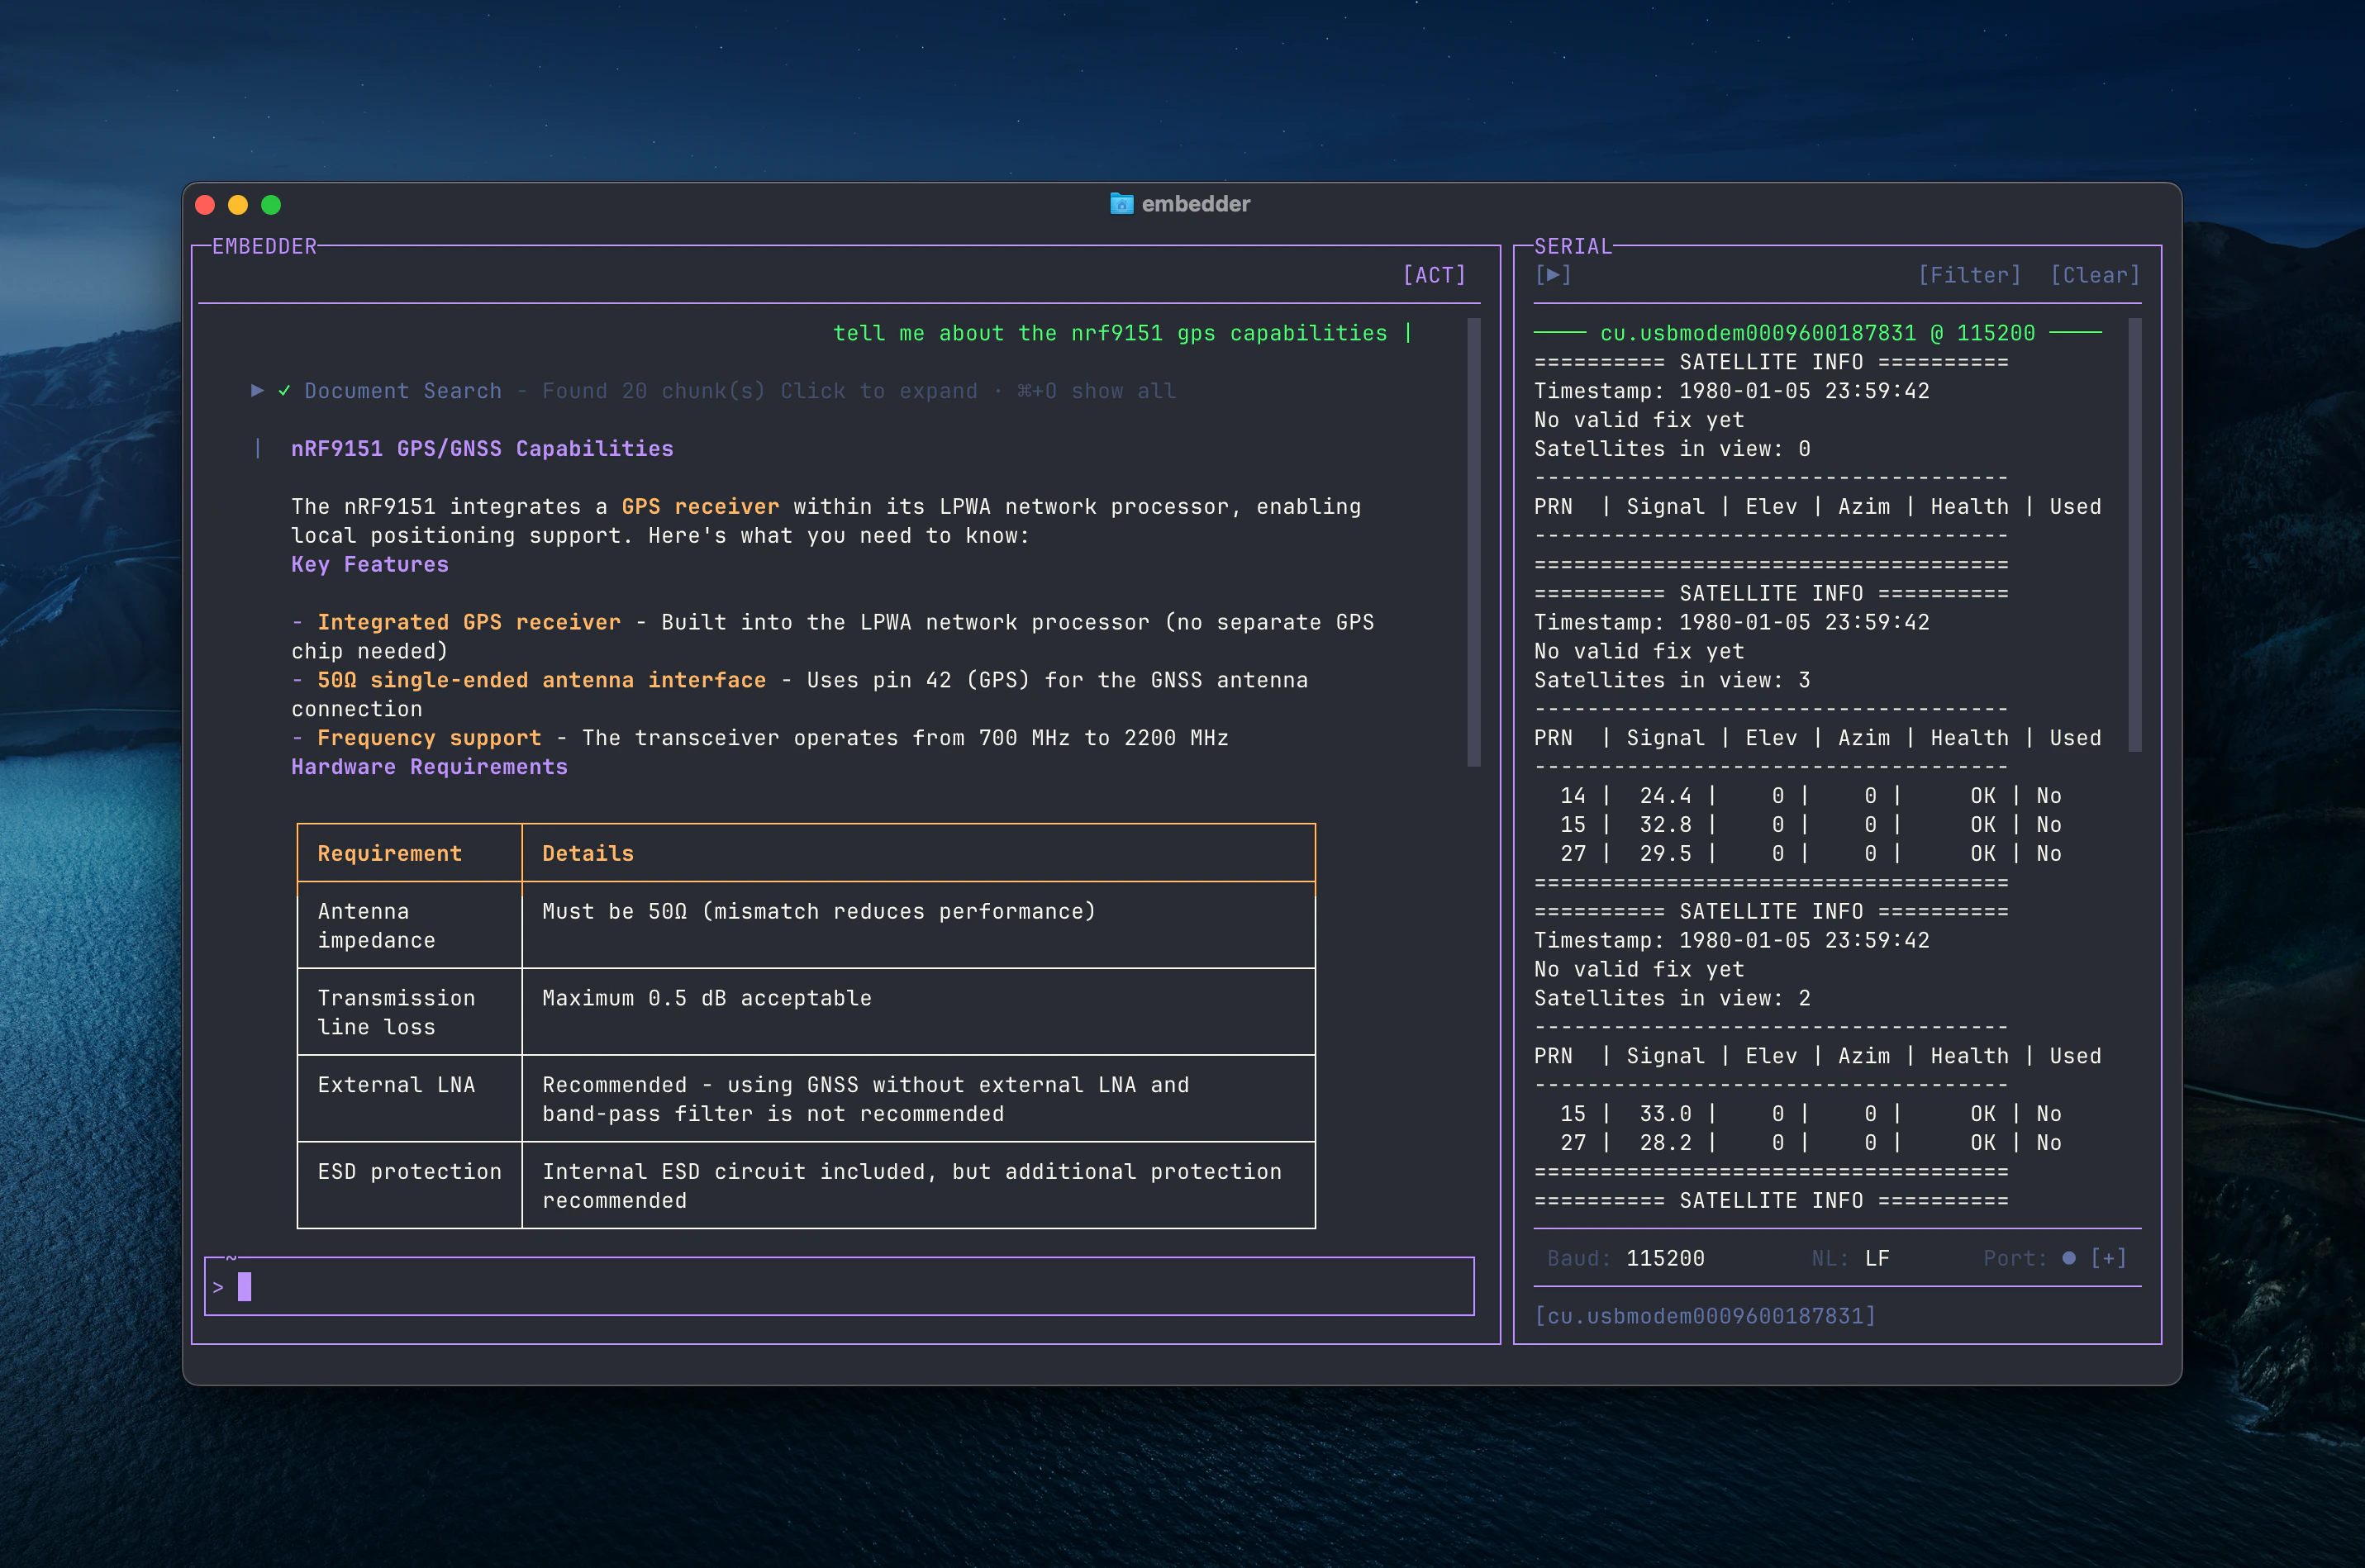
## चरण 4: पहला सवाल पूछें
अब आप नेचुरल लैंग्वेज में हार्डवेयर-संबंधित सवाल पूछ सकते हैं।
उदाहरण:
```
tell me about the nrf9151 gps capabilities
```
कस्टम पेरिफेरल जोड़ने के लिए [Common Workflows](/hi/core-concepts/common-workflows) देखें।
बाद में `/peripherals` से पेरिफेरल कॉन्फ़िग बदल सकते हैं।
## चरण 4: पहला सवाल पूछें
अब आप नेचुरल लैंग्वेज में हार्डवेयर-संबंधित सवाल पूछ सकते हैं।
उदाहरण:
```
tell me about the nrf9151 gps capabilities
```
 कोडबेस से जुड़े सवाल भी पूछ सकते हैं:
```
what does this project do?
```
```
where is the main entry point?
```
```
explain the folder structure
```
## चरण 5: पहला कोड बदलाव
```
add a function to toggle the LED on GPIO pin 13
```
Embedder आमतौर पर:
1. सही फाइल ढूँढेगा
2. ज़रूरी रजिस्टर संदर्भ पढ़ेगा
3. बदलाव प्रस्ताव दिखाएगा
4. आपकी मंजूरी मांगेगा
5. बदलाव लागू करेगा
जब तक आप स्पष्ट रूप से न कहें, Embedder फाइल बदलने से पहले अनुमति मांगता है।
## चरण 6: Git के साथ काम करें
```
what files have I changed?
```
```
commit my changes with a descriptive message
```
## चरण 7: बग फिक्स या फीचर
```
my SPI peripheral isn't responding - help me debug
```
```
I'm getting a hard fault when I call HAL_UART_Transmit - why?
```
## चरण 8: आगे क्या करें
इन workflows को भी आज़माएँ:
* ड्राइवर लिखना
* पेरिफेरल कॉन्फ़िग करना
* initialization कोड बनाना
* प्लेटफ़ॉर्म पोर्ट करना
और उदाहरणों के लिए [Common Workflows](/hi/core-concepts/common-workflows) देखें।
बेहतर परिणाम के लिए सवाल जितना हो सके उतना specific लिखें।
## अगला कदम
* [Best Practices](/hi/core-concepts/best-practices)
* [Common Workflows](/hi/core-concepts/common-workflows)
## मदद
* Embedder में `/help`
* Discord community
कोडबेस से जुड़े सवाल भी पूछ सकते हैं:
```
what does this project do?
```
```
where is the main entry point?
```
```
explain the folder structure
```
## चरण 5: पहला कोड बदलाव
```
add a function to toggle the LED on GPIO pin 13
```
Embedder आमतौर पर:
1. सही फाइल ढूँढेगा
2. ज़रूरी रजिस्टर संदर्भ पढ़ेगा
3. बदलाव प्रस्ताव दिखाएगा
4. आपकी मंजूरी मांगेगा
5. बदलाव लागू करेगा
जब तक आप स्पष्ट रूप से न कहें, Embedder फाइल बदलने से पहले अनुमति मांगता है।
## चरण 6: Git के साथ काम करें
```
what files have I changed?
```
```
commit my changes with a descriptive message
```
## चरण 7: बग फिक्स या फीचर
```
my SPI peripheral isn't responding - help me debug
```
```
I'm getting a hard fault when I call HAL_UART_Transmit - why?
```
## चरण 8: आगे क्या करें
इन workflows को भी आज़माएँ:
* ड्राइवर लिखना
* पेरिफेरल कॉन्फ़िग करना
* initialization कोड बनाना
* प्लेटफ़ॉर्म पोर्ट करना
और उदाहरणों के लिए [Common Workflows](/hi/core-concepts/common-workflows) देखें।
बेहतर परिणाम के लिए सवाल जितना हो सके उतना specific लिखें।
## अगला कदम
* [Best Practices](/hi/core-concepts/best-practices)
* [Common Workflows](/hi/core-concepts/common-workflows)
## मदद
* Embedder में `/help`
* Discord community